Everyone else has one. And you want one too.
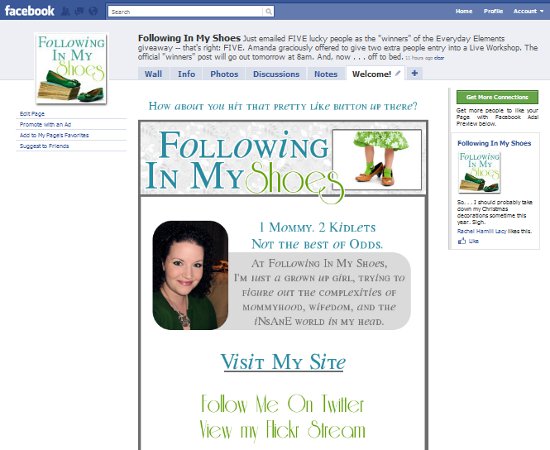
Your own, special, unique, pretty Facebook Landing Page for your blog’s fan page.
Most blog designers are now offering to make and install a custom landing page for you, but it IS possible to do it yourself . . . if you don’t mind putting in a little time.
If you don’t have the time, then hire a designer. Stephanie at Design Press Unlimited creates FANTASTIC landing pages. I want to be her when I grow up.
Since I’m independent and like to do my own design work (and save myself a little money), I spent a few days “googling” how to create a Facebook Landing Page that would welcome new followers AND match the look of my blog.
(of course, since I am a wee bit addicted to changing my blog look, I’ll have to start changing this too, won’t I?)
1. Your first order of business is to create the graphic for the new landing page.
If you don’t have Photoshop or a comparable graphics program, there are several free programs you can download. My personal favorite is GIMP. Even though I have Photoshop Elements, I use GIMP to create all the graphics I use on my blog.
The graphic size needs to be around 520 pixels wide and can be nearly any length you need. Be careful though — you don’t want to make it so long that people have to scroll forever to see all the info you have there. That’s never a good thing.
What you put in the graphic is up to you. Obviously, you want your blog name/logo, but why not add a blurb about yourself and your blog . . . a link to follow you on Twitter, YouTube or any little thing you love and use.
And, don’t forget to include a link/graphic that goes directly to your site! If they’ve stumbled across your fan page from another source, you want to give the potential new follower an easy way to check out your blog.
(I’ve seen fan pages that also included links to specific blog categories, such as reviews and giveaways; I didn’t do that since I don’t really do a lot of those)
When you have your new Facebook Landing Page graphic ready, save it as a png or jpg file.
2. Upload your new graphic to an online photo hosting site (like Photobucket).
You’ll need to do this step in order to have a URL for your photo — a necessary part of the formula.
3. Install the Static FBML app to your Facebook Fan Page.
Facebook doesn’t have a default option for creating a landing page or adding any tabs other than the preset options. To set up a custom page, you have to use the FBML app.
Mashable has a good tutorial for installing and setting up this app. In fact, it’s so good, I’m not going to reinvent the wheel and outline the steps here. Read and follow their tutorial on installing/setting up the Static FBML App.
The only thing the Mashable tutorial DOESN’T do is explain how to install the html/css code for your graphic. But don’t worry, I’ve got ya.
4. Generate Facebook CSS Code for your Custom Graphic
Doesn’t that sound impressive and hard? Don’t worry — it’s as easy as pie. Seriously.
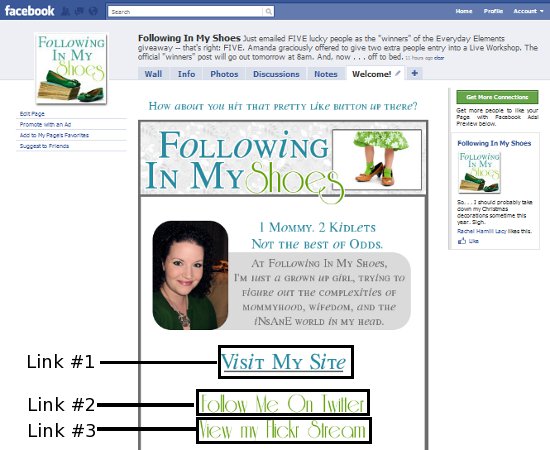
Image Mapping is the process of creating links associated with various parts of an image — you essentially create “map-points” to tell computers where those links are supposed to be.
For example, on my Landing Page graphic, there are three external links:
Without an Image Mapping code, those links are nothing more than text within my graphic. . . completely dead.
If you know how to map an image (and set up the CSS necessary for Facebook), then more power to you. If you don’t want to worry about having to figure that code out, I HIGHLY recommend using the following on-line mapping generator: Image Maps.Com
This is a simple “drag and drop” kind of generator that is nearly fool-proof.
- Enter the image URL you generated when you uploaded your graphic to Photobucket.
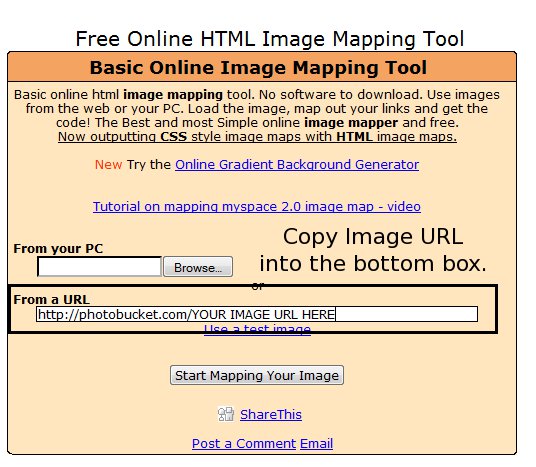 On the next screen (visible after your “congrats – you uploaded your image” screen), you’ll be given a series of options on the right hand side of the page.
- First — under “Add New Map,” select “Rectangle” for normal text images. If you have set up your text on a round background, then you’ll need to select “Custom Shape” and follow the steps give.
- After select Rectangle, you’ll see resizeable rectangles appear on your image. Drag them to the spots you want linked to outside websites and then increase the size as needed to allow the rectangle to encompass the entire space.
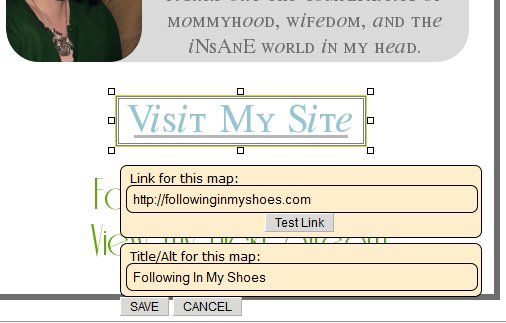
- Add the appropriate URL in the “Link for this map” cell and then the Title in the following cell. Hit “SAVE.”
- Repeat this step for any other (starting with the select your shape step) area that needs to be image mapped to an outside link.
- When finished, under the “Advanced Tool Box” on the right side of the page, UNCHECK “base URL,” “show text links,” and (if desired) the “Allow Backlink” options.
- Just above the Advanced Tool Box, CHECK the “CSS for Facebook” box.
- Hit “Get Your Code.”
The next screen will give you various types of image mapped code. Click on the CSS CODE option and then copy the code provided. This will be the code you use on your Facebook Welcome Page.
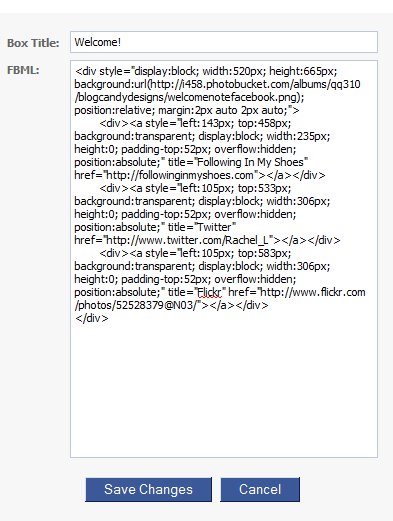
5. Go into your Static FBML app and paste the CSS code into the box.
6. Hit “Save Changes” and you’re Done!
If you check out your Fan Page, you should see your brand spanking new Welcome Page. AND if you followed the steps outlined in the Mashable Tutorial from step 3, you’ll have it set up as the landing page for potential followers.
YAY FOR YOU!
If you set up a Facebook landing page for your blog’s fan page, let me know! I’d love to swing by and see it. :=)



[…] to a FANTASTIC tutorial by Rachel over at “Following In My Shoes” I’ve created a new custom […]