 I struggled this year planning teacher gift, and (as a natural extension of that fact) I waited to the very. last. minute. to finally make a choice.
Then, my favorite vegetarian, Kiersten from Oh My Veggies, published a MONSTER of a food gift list: 100 DIY Food Gift Ideas.
OF COURSE!! My lightbulb moment (finally). I spend all of my time in the kitchen .. I have small children who love helping me in said kitchen … I would make an edible gift!
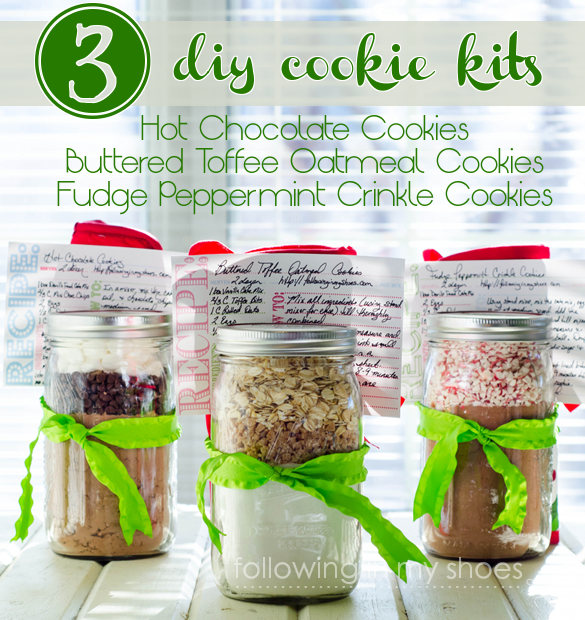
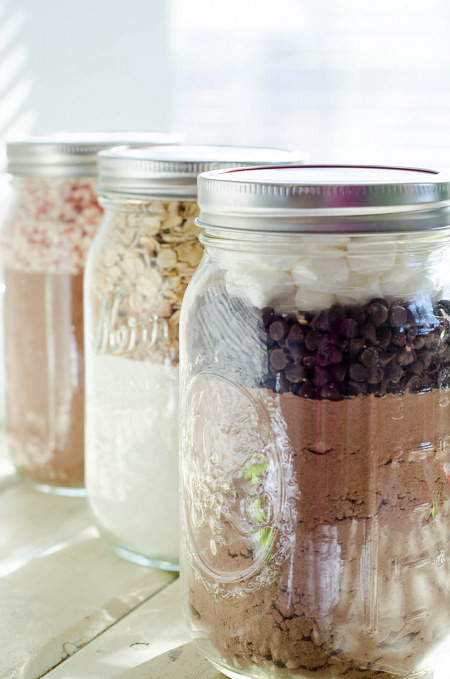
Since I’m obsessed these days with cake mix cookies (hello! easy cookies when you have children hanging off of every limb all. day. long.), I decided to use some of the cookie flavors I’ve been playing with and package them for easy teacher gifts.
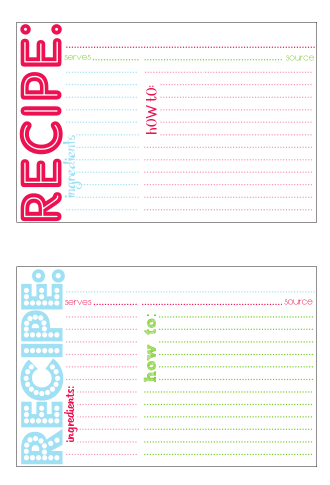
No — seriously easy teacher gifts. I think it took less than 3 minutes per jar to package, another minute to add the pre-printed label and tie a bow. The longest aspect of this project was hand-writing the recipes out on the cards.
And, yup, I have printables for you too (at the bottom of this post) … because I couldn’t find ones that I liked and decided I just HAD to make some of my own. Then, realized I might as well share them since I went to all the trouble to make them.
See how giving I am??????
As far as these cookies go, everyone in our little family has a favorite. The Husband’s favorite was far and away the Buttered Toffee Oatmeal Cookies (which taste like Buttered Pecan Ice Cream … without the pecans, of course). Mr. Boy is in LOVE with the Hot Chocolate Cookies and this Mama can’t get enough of the Fudge Peppermint Crinkle Cookies.
P.S. All of the cookies kits are easy enough for little fingers to help you scoop and package. Yay for a family project!
- 1 Box Devil's Food Cake Mix
- 2 Eggs
- ⅓ Cup of Oil
- ½ Cup Mini Semi-Sweet Chocolate Chips
- 1 Cup Mini Marshmallows
- Preheat your oven to 350 degrees.
- Empty the cake mix into a mixing bowl and add the eggs and oil.*
- Stir (or mix with a mixer) until blended.
- Add the mini chocolate chips.
- Using two small spoons, measure out and shape each cookie into a small ball and place on a parchment lined baking sheet.
- Add three mini marshmallows to the top of each cookie, pushing them lightly into the raw dough.
- Bake for 8-9 minutes. Be careful not to overcook and burn the cookie!
- Remove and allow to cool for a minute until removing the cookies to a wire rack to completely cool.
- Store in an air-tight container; separate cookie layers with wax paper to avoid sticking.
- Pour the cake mix into a clean and dry wide-mouth canning jar, gently packing the mix down.
- Next, add the mini chocolate chips in an even layer on top of the cake mix.
- Pack the mini marshmallows into a snack-sized ziplock bag, removing as much air as possible before sealing the bag.
- Fold the bag and add it to the jar.
- Seal with the lid.
- 1 Box White or Vanilla Cake Mix
- 2 eggs
- ½ Cup very soft Butter
- ⅔ Cup Toffee Bits
- 1 Cup Rolled Oats
- Using a stand mixer, combine the cake mix, eggs and butter. *
- Gently mix in the toffee bits.
- Add the oats and stir slowly to fully incorporate (the dough will be quite thick).
- Using two small spoons, measure out and shape each cookie into a ball.
- Place on a parchment lined cookie sheet and bake for 8-9 minutes or until bottom edges are golden brown.
- Remove and cool cookies on a wire rack.
- Store in an air-tight container.
- Empty cake mix into a clean, wide-mouth canning jar, lightly packing the mix down.
- Add the toffee bits in an even layer on top of the cake mix.
- Next, carefully add the rolled oats.
- Seal with the lid.
Continue with directions as written
- 1 box Devil's Food Cake Mix
- 2 Eggs
- ⅓ Cup Oil
- 1 Cup Crushed Peppermint or Candy Canes
- 1-2 Cups Powdered Sugar
- Using a stand mixer (or by hand), mix the cake mix, eggs, and oil.*
- Add the crushed peppermint and blend till well mixed.
- Using two small spoons, measure and shape each cookie into a ball.
- Drop the cookie into bowl of powdered sugar and lightly toss or roll to coat.
- Remove and place each cookie on a parchment lined baking sheet. Bake for 8-9 minutes or until wide cracks/ridges form on the top of each cookie.
- Remove from the oven and allow to cool slightly before removing the cookies to a wire rack.
- Store in an air-tight container.
- Pour the cake mix into a clean and dry wide-mouth canning jar, very lightly packing the mix down.
- Next, add the crushed peppermint in an even layer on top of the cake mix.
- Seal with the lid.
Free Printables for DIY Mason Jar Gifts
Click the images to access the full-sized images; you’ll need to right-click and “save-as” to save them to your computer.
Next, print them yourself on white card-stock OR have them printed at your local printing company (which is what I did).
Cut out and you’re ready to go!
The gift tags can be attached any way you want but they will also fit the top of your wide-mouth jar lid (in between the lid and the ring-seal).


see what is new about topical acne treatment
For My Fellow Procrastinators: 3 DIY Cookie Mix Kits and printables – Following In My Shoes